Thursday 29 March 2018

we must celebrate. | Fancy Friday Blog Hop


hello there.
we MUST celebrate.
indeed brother.
These cards were created as part of the Fancy Friday Blog Hop where current and past Stampin' Up! Artisans join together to try to inspire ourselves and others. This month we are using several pieces of designer series paper.


My two projects includes the following:
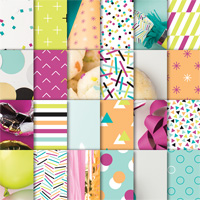
           1. Pick a Pattern Designer Series Paper
           2. Tutti Fruitti Designer Series 6x6 Stack
           3. Wood Textures Designer Series 6x6 Stack
           4. Color Theory Designer Series 6x6 Stack


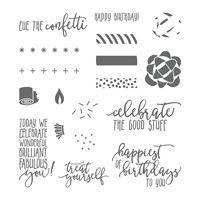
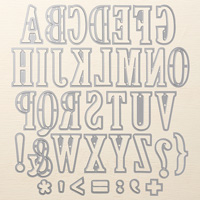
I am in love with Sans Serif capital fonts so the We Must Celebrate Stamp Set does not disappoint. But this stamp set is part of the 2018 Occasions Catalog so be sure to stamp it up because the sentiments work perfectly with all-occasion cards! The cute furry friends are just a bonus! #wink


Up next is one of my most favourite people ever - Paula Dobson! Keep hopping along to see what she created!
Are you following me on instagram? 
This is where I show the majority of my projects and inspiration, along side my loves and life.  
Be sure to find me @cathycaines.

Wednesday 28 March 2018

i just love all the babies | Be Inspired Design Team Blog Hop


We are celebrating new life on the Be Inspired Design Team Blog Hop this month.
Just today my five year old son looked at me and said 
"I just love all the babies. All the baby animals and all the little babies."
I am thinking that means all the little animal and human babies.
And I couldn't agree more.

PROJECT DETAILS://

Today's project uses A Little Wild Stamp Set from Stampin' Up!, as well as the co-ordinating dies. I water coloured the elephant using the Stampin' Write markers with the aqua painter.  It's my favourite way of water colouring right now! I paired the designed with the Sale-a-Bration envelopes - there's only two more days to grab them!


I know, I know...
Now you want to go cuddle all the puppies and baby elephants. :)

Be sure to keep hopping to my friend, Louise Sharp! I adore her and I know you will too!

Saturday 24 March 2018

a magical celebration | Crazy Crafters Blog Hop


Today I am simply humbled to be blogging with the Crazy Crafters Blog Hop.
It seems that I am a special guest today!
And that.
Well, that amazes me.
So with all my heart, thank you.


Today's project feels like my every day style as my seven year old daughter calls herself Jane-icorn and fights with her brother on whether unicorns are or are not real. In other words, we talk about unicorns every day.

Did you know that Scotland's official animal is the Unicorn? #iknow #icouldntbelieveiteither

PROJECT DETAILS://

The background was created with melon mambo refill ink and an aqua painter. The edges of the watercolor paper is machine stitched. The unicorn image from the Stampin' Up! Magical Day Stamp Set was coloured using Stampin' Blends and the sentiment comes from the Fairy Celebration Stamp Set. Don't forget the clear Wink of Stella... that's a must!

Are you following me on instagram? 
This is where I show the majority of my projects and inspiration, along side my loves and life.  
Be sure to find me @cathycaines.

I can't say thank you enough for dropping by today!
Be sure to check out everybody's project today!
Cathy

Friday 23 March 2018

just inking up my stamps with my markers... | #tgifc152


It's technique time with the TGIF ChallengeDesign Team.
This week we are inking up our stamps with markers.
Yup.


What does that mean?
Well, it means that we colour on the stamp itself using different markers. It works best if you are using a red rubber stamp and the Stampin' Write markers.
Well, don't take that as set in stone.
That's quite frankly my opinion.


Stampin' Up!'s Floral Phrases is my favourite stamp set to do this technique with. It's so easy to create a beautiful effect without too much effort.

And well, that's my favourite type of techniques.
Quick and easy.

Thanks for dropping by today!! I can't wait to see what you create this week with this technique!
Cathy

Sunday 18 March 2018

he came home happy. | Scrapbook Sunday


He came home happy.
Running off the bus and across the 
street sporting his groundhog
day hat. He hasn’t 
been well and putting him
in a new classroom seemed
to have unsettled him.
Not today.
With the sun shining
we both were starting to think 
thatSpring might actually be 
around the corner.
It was a Happy Ground Hog Day!
February 2, 2018

PROJECT DETAILS://

Today's project was created using the above sketch and pieces of patterned paper from the Wood Textures Paper Stack and the True Gentleman Designer Series Paper. Of course after I was happy with the placement of the papers, I machine stitched the pieces onto the page. You'll notice that I was able to separate the different papers by distressing the edges of the patterned paper exposing the white edges.


As always, scrapbooking for me is truly about those words.
So please.
Do me a favour and write your stories.
A picture to go along with it is just the gravy on the top.

Thanks for hopping along with us today! Keep hopping along!
Cathy

Be sure to keep hopping by following along with the InLinkz links!

Friday 16 March 2018

an oldie but a goodie | #tgifc151


It's an oldie stamp set.
It's been around at least two years.
But its a goodie.

It's a stamp set I reach for whenever I want to colour a flower.
Its a stamp set whenever I want a cursive + serif font combination.

So you should probably add this stamp set on your list.
Birthday Blooms by Stampin' Up!
You can thank me later.

Today's project is created for the TGIF Challenges Design Team. Each week we bring challenges in order to inspire you.  This week's challenge is an easy one for me - I am so ready to see signs of Spring that colouring and stamping flowers bring joy to my heart.

While this is a simple card, the colouring was done using the Stampin' Blends markers. Specifically the Light and Dark Calypso Coral colours as well as purple tones with Rich Razzleberry. Of course, the image is outlined with Light Crumb Cake.


As always, I am so glad you dropped by today - I sure hope you have an amazing day and even more I hope that you see signs of Spring all over your little edge of the Earth.

Cathy


Thursday 15 March 2018

she is... Picture Perfect. | Stampin' Up! Artisan Design Team Blog Hop


Well, hello there my friends.
I am so glad you've dropped by.
It is most definitely "nice to meet you".


It's your lucky day because today is the March 2018 edition of the Stampin' Up! Artisan Design Team Blog Hop where sixteen Stampin' Up! demonstrators from around the world join together in the hopes to inspire each other and of course, you!

Like other months, we are focusing on a specific product.  This month we are focusing on the Picture Perfect Birthday Stamp Set and the Picture Perfect Party 6x6" Designer Series Paper. Quite honestly, I was in love with this product suite from the very start. 

Surely, you are right.  It's different with its photographic prints but different is nice sometimes, isn't it? And can the stamp set get any more perfect?


My finished product is a birthday banner.  These banners are becoming more and more trendy as we celebrate our loved ones lives in the forms of pictures. This banner is no different showing several layers coming mutliple products but at the end of the day, the star of the show is the pictures.

Photo Credit throughout this post goes to White Willow Photography

WHERE TO BEGIN?

When I started this project, I began laying out the products along with the photos. I mixed and matched ribbons and varying shapes and sizes of cardstock and patterned paper. Sometimes I take a snap shot of this so that I can have a different perspective.  Here's how it looked before I finalized what would go where.

PROJECT DETAILS://

Once I decided the placement of everthing, the Birthday Mini Binder Clips made it easy to join the Berry Burst Metallic-Edge Ribbon and Silver Mini Sequin Trim to each of the photos. The paper banner behind the photos is made up of a combination of Berry Burst cardstock and the Picture Picture Party Designer Series Paper strung together with Whisper White Baker's Twine.

Finally, I decided that all that was needed was the words "happy birthday" using the Large Letter Framelit Dies in Soft Sky Cardstock.  Are you wondering how they are floating? Glue dots are your best friend sometimes - Instead of using a hole punch, I adhered the letters to the Whisper White Baker's Twine using glue dots. #boom #adttricksandtechniques


I am so thankful that you have dropped by to check out my project today.
Be sure to keep hopping to check out the amazing Charlet Mallet!


Are you following me on instagram? That's where you can find me most often!

Are you lost? 
Sometimes links break - use this blog roll to get you back on track!
BLOG ROLL

Please see below for a list of Stampin' Up! products used in today's project:

Wednesday 14 March 2018

You Are Simply Amazing | Stamp to Share International Blog Hop


I am so excited to be back with the International Stamp to Share Blog Hop this month!


This month we are featuring the Stampin' Up! Sale-a-Bration items: 

PROJECT DETAILS://

Today's card features a technique where I don't fully cut out the die cut. Leaving a sliver of cardstock in tact at the bottom as you can see in the photo below. There's lots of fun things you can do with this technique so give it a whirl!


In order to achieve this you may need to try this a could times but lay the top cutting pad from your Big Shot Die Cutting Machine just above the bottom of the thinlet.


To make life easy for me, I use my scoring tool to create a soft line where I'd like to cut the line.  It also is a neat trick to help you get the inside bits and bobs a little easier.


In addition, the final project included Stampin' Up! product items True Gentleman Designer Series Paper, Linen Thread and Wood Textures Designer Series Paper Stack


As always, I am so glad you dropped by but most of all...

you are simply amazing.

Keep hopping along to my friend in the UK, Monica Gale!