
Hi.
It's me.
Cathy.
Cathy Caines.
Sometimes I talk too much and other days I talk too little.
Sometimes I eat breakfast and other days I do not.
My husband snores.
My daughter climbs up the handle on my fridge and flips backwards.
My son doesn't like his toys in the toy box.
The dog takes up way too much room on my pillow.
A great day is when we all sit and eat supper together that I actually cooked on the stove.
That's life in my world.
And I can't wait to share it with you.

Today is special.
It's the first Stampin' Up! Artisan Blog Hop for 2017 and you'll be meeting some of my new friends from around the world who will be sharing crazy amazing projects with you.
If you didn't know, in the Stampin' Up! world, being an Artisan is a big deal.
There. I said it.
To hear the story of my 2017 Artisan phone call and receiving my award, you'll have to check out these to blog posts: The Phone Call + The Secret.
 |
| Photo Credit: Stephanie Linthorne |
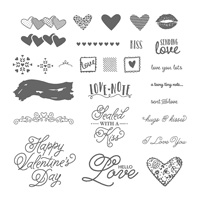
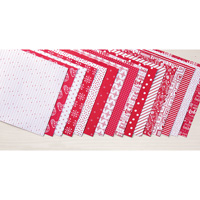
With Valentines Day, just around the corner I thought I'd use the Sending Love Suite in order to create a small mini album. I never let mini albums take a great deal of time...
I am a "Wam. Bam. Thank You Ma'am kind of gal."
It's time that you did the same.
Here's how:
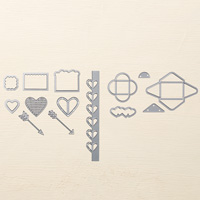
Step 1: I cut out several banners from Sending Love Designer Series Paper (DSP) using the Banner Framelits. I almost always have at least one transparency in my albums. This time, I incorporated the Fabulous Foil Acetate because the Sending Love glassine sheets were a little too thin.
Step 2: Print photos from your phone to your home printer. I use the Canon Selphy C910 to have access to my photos whenever I want. With my iPhone, I use the Pic Collage app to select the photos I want in the desired size. I save the layout and then hit "Send to Printer" from my Camera Roll. Ta-dah! I use Pic Monkey when I am on my computer.
Step 3: Put your album together. Don't over think it. Alternate between a a light piece of paper and a dark piece of paper. Secure your papers with a ring or ribbons.
Step 4: Decide which photos are going where. Use a glue dot to temporarily hold them in place in case you change your mind. No need to commit just yet...
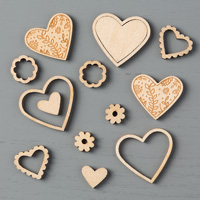
Step 5: Die cut a bunch of stuff. Pick out 3 or 4 other supporting items like wood veneers and pearls.
Step 6: Give yourself 3 or 4 minutes to embellish each page then move on to the next. You can always come back to it if you like. Don't go over your time limit because you'll just be running in your wheelie with your hamster.
Step 7: Add dimension. To do by adding an extra strip of paper or anything else that floats your boat. Think tickets or felt or die cuts.
Step 8: Add texture. Add ribbon or tassels... I added some wooden veneers through the ring.
Step 9: Add journalling. With music playing or in the quiet, write down your story. What is it that you want to say? Don't over think. Just write.
Step 10: You are done. Have a sandwich. Ham preferably. Hold the mustard.

Oh... you noticed the tassels, did you?
They are very trendy right now. They took 2 minutes to create and definitely helped pull this album together. How?... oh... how do you do tassels?... You'll have to ask Google. However, I will tell you that I secured my ends with a hot glue gun.

I added the little envelopes with "The Reasons Why I Love You" on the back side of some pages. I hand wrote them even though I didn't like my handwriting that day.... they always like things handwritten.
But seriously, who can resist those teeny tiny envelopes from the Love Notes Framelits?

Those faces. So sweet.
What else is sweet? Those little 5 cent "tickets" - cut them out of the Sending Love Designer Series Paper. Adhere them with a mini paper clip.
 |
| Photo Credit to Sage Photography |
Use ribbon to create a "pull tag". Use a regular stapler to adhere it. That metallic ribbon is a sale-a-oration item... ahem. You need it. Just saying.
 |
| Photo Credit to Stephanie Linthorne |

If you made it this far, you've done well.
Thanks so much for dropping by. Make sure to follow me on Facebook and on Instagram. I do Facebook Live Events every Thursday night at 8pm Eastern Time (Today!) and post to Instagram regularly.
PS. It's so great to meet you. :)
You are off to see Dani Dziama now. She will blow your mind. I've followed her for a long time and she knows her stuff.


Seriously Cathy! Way to blow it out of the water!!! This is amazing!!
ReplyDeleteWell, I don't know what to say except, WOWSERS!! What an awesome mini album and I loved reading you funny, but real post! I am so excited to be designing with you this year Cathy!
ReplyDeleteCathy, wow. Just wow. I adore your little album! And your writing :) And I am so very excited to be on the ADT with you :)
ReplyDeleteWhat a stunning mini album! Wow! Really love it!
ReplyDeleteHallo Cathy, wow super schön und alles passt perfekt zueinander! Liebe Grüße Maike
ReplyDeleteCathyyy!
ReplyDeleteWOW! So beautiful! Impressive! I am very excited !
I look forward to our year!
I LOVE your intro Cathy, I ADORE your album! Incredibly creative and well put together,I feel inspired and in awe! I'm looking forward to sharing this year on the team with you x
ReplyDeleteHahaha Cathy I love your blog post especially the one about the phone call. You speak my kind of language lol. Just love your mini album. Cute kids by the way
ReplyDeleteBOOM *mic drop*!
ReplyDeleteThe mini album is fabulous and I loved reading your post. You are funny.
ReplyDeleteTotally amazing Cathy! Congratulations, can't wait to follow your awesome creations.
ReplyDeleteIan doesn't like his toys in his toy box either...but I always eat breakfast. I go to bed just so I can get up and EAT LOL! And this is perfection and I feel totally inadequate now. Those tassels, GAH! <3
ReplyDeleteKiller! Perfect in its simplicity but with a major wow-factor. Beauty!
ReplyDeleteThis mini album is amazing, Cathy!!! Seriously! Love, love, love it!! SO excited to be on the ADT with you this year. Rochelle xo
ReplyDeleteYou are a scrapbooking genius! I can't wait to see all of the awesome creations you have to share with us this year! & I just made my first tassel last week! Happy to know they are trendy. Thank U
ReplyDeleteTruly a gift made with love. Adorable, and well put together with all the little details, but not tooooo over the top.
ReplyDeleteAwesome mini album Cathy
ReplyDeleteI just had to say, "Too cute for words"! I love your projects!
ReplyDeleteThis is awesome! I LOVE the tassels!!
ReplyDeleteLovely album!
ReplyDeleteGreat intro! LOL! And I am so in love with your project! Thank you for the inspiration. :)
ReplyDelete